
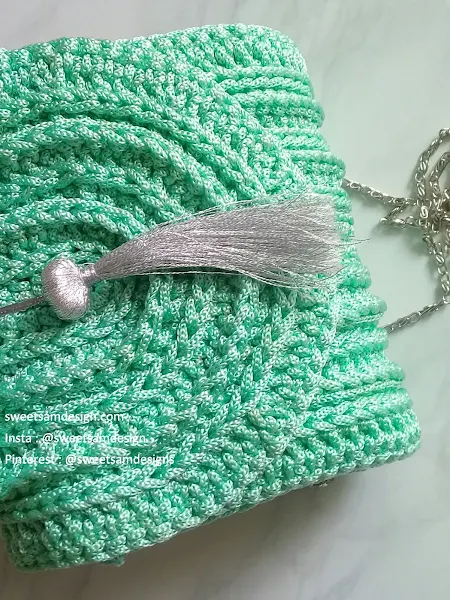
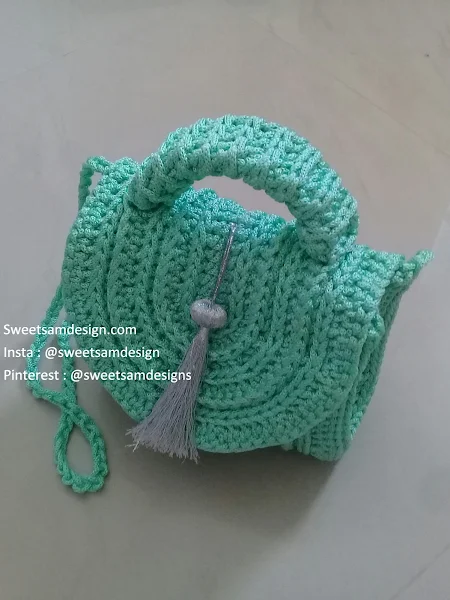
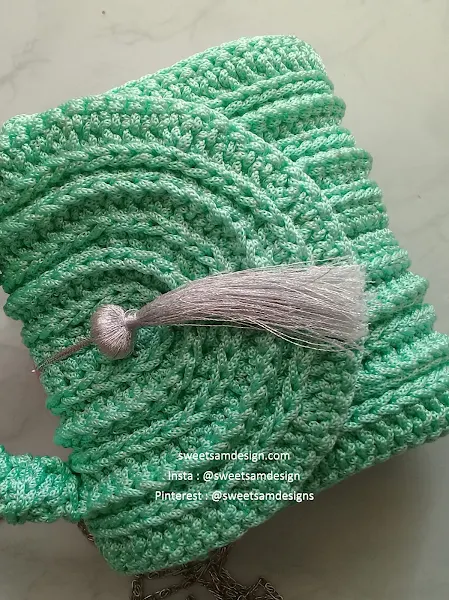
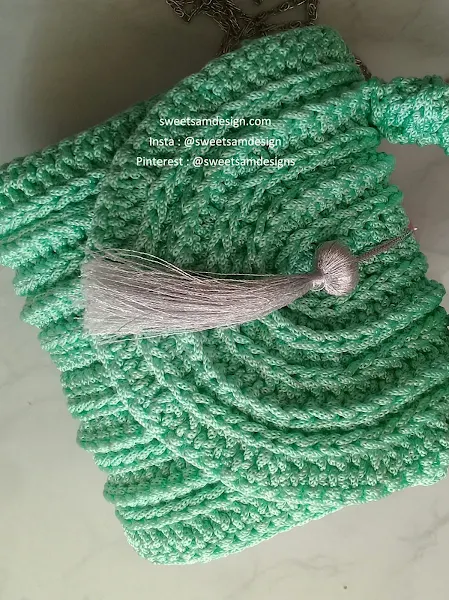
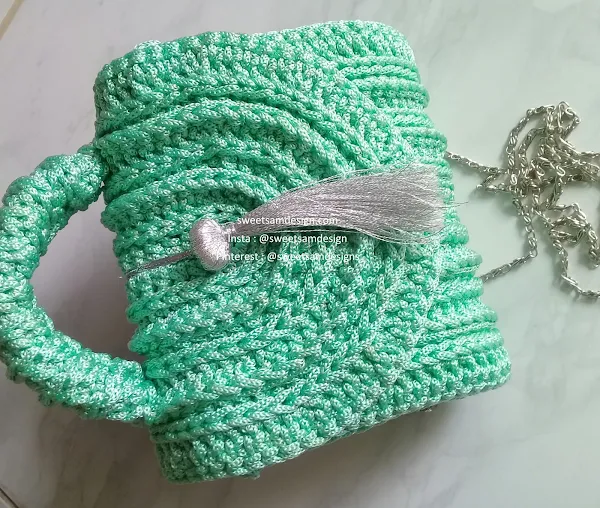
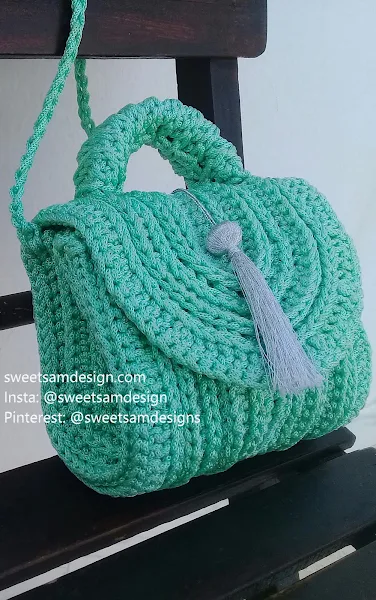
Welcome to a unique and creative crochet tutorial that combines the timeless beauty of crochet with the modern and trendy charm of macramé cord. In this tutorial, we will guide you through the process of crafting a Crochet Bag with a Unique Texture, achieved by skillfully working the DC (Double Crochet) stitch into the 3rd hidden loop. What sets this project apart is the incorporation of macramé cord, adding strength and character to the bag's design. This tutorial is your gateway to create an exquisite accessory that combines artistry, texture, and functionality in one remarkable piece.
In the world of crochet, the DC stitch is a fundamental technique that allows you to create stunning textures and designs in your projects. One particularly intriguing method is working the DC stitch into the 3rd hidden loop. This hidden loop technique adds depth and texture to your crochet bag, making it stand out as a unique and eye-catching accessory.
Add this pattern to your Ravelry Queue and Favorites
The pattern is available for free below, or you can buy the printable, ad-free version from my Ravelry Shop.
The pattern is available for free below, or you can buy the printable, ad-free version from my Ravelry Shop.

Get ready to embark on a crafting journey that seamlessly merges tradition and innovation, resulting in a stunning accessory you'll be proud to showcase.

Skill Level
The project would be great for a beginner as it require only basic stitches.Gauge and Sizing
Gauge: 14 stitches and 6.5 rows = 10 cm.Dimension: The bag size is about 18 cm long, 15 cm wide and 8 cm deep.
Materials You'll Need
1. Macrame cord in your choice of color.2. Crochet hook appropriate for your cord (typically 4mm).
3. Yarn needle for weaving in ends.
5. Scissors for cutting yarn and finishing off your work.
4. Stitch markers (optional).
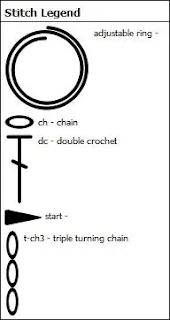
Crochet Stitches Abbreviations
. mc = magic circle. ch(s) = chain(s)
. st(s) = stitch(es)
. sl st =slip stitch
. dc = double crochet
. [ ] = work directions in brackets the number of times specified
Attain proficiency in these Stitches by clicking on the following link:
Unlock the Art of Crocheting: A Step-by-Step Guide to Mastering Basic Stitches
Notes
1. On the wrong side of work (rows: 2, 4, 6) you will work the dc stitch inserting the hook into the 3rd hidden loop at the front of the work, under the front loop of st.2. On the right side of work (rows: 3, 5) you will work into the 3rd hidden loop that is placed at the back of the work, under the back loop of st.
Unlocking the Mystery: Front Loop vs. Back Loop Crochet

How to Create a Crochet Bag : Written Instructions
Step 1 : Create Bag Front and Back Panels
Make mc, ch 54,Row 1: ch 3, dc 54, 6 dc in mc, turn sideways and continue along other side of the foundation ch, dc in remaining loop of each of next 54 chs, turn.
Row 2: ch 3, dc 54, [2 dc in 1 st] 6 times, dc 54, turn.
Row 3: ch 3, dc 54, [dc, 2 dc in 1 st] 3 times, [2 dc in 1 st, dc] 3 times, dc 54, turn.
Row 4: ch 3, dc 54, [dc, 2 dc in 1 st, dc] 6 times, dc 54, turn.
Row 5: ch 3, dc 54, [dc 3, 2 dc in 1 st] 3 times, [2 dc in 1 st, dc 3] 3 times, dc 54, turn.
Row 6: ch 3, dc 54, [dc 2, 2 dc in 1 st, dc 2] 6 times, dc 54.
Step 2 : Create Bag Side Panel (make 2)
Make mc, ch 13,Row 1: ch 3, dc 13, 6 dc in mc, turn sideways and continue along other side of the foundation ch, dc in remaining loop of each of next 13 chs, turn.
Row 2: ch 3, dc 13, [2 dc in 1 st] 6 times, dc 13, turn.
Row 3: ch 3, dc 13, [dc, 2 dc in 1 st] 3 times, [2 dc in 1 st, dc] 3 times, dc 13.
Step 3 : Create Bag Handle
Make ch 10, sl st in the first ch.Round 1-10: ch 3, dc 10, sl st in top of ch3.
Step 4 : Create Bag Strap
Make ch 115.To create a strap for your bag, chain a length that suits your preference. The length will depend on whether you want a shoulder strap or a shorter handle.
Step 5 : Finishing
. Attach each side panel to the front and back panels using 43 sl st like shown in the following photo.
. In top of the bag, attach each side of the bag Handle to the top of 4th row stitches, using sl st.
. Fasten off your yarn and weave in any loose ends using a yarn needle.
. Add any embellishments, buttons, or closures to your bag as desired.

How to Create a Crochet Bag : Crochet Charts
Chart 1 : Front and Back Bag Panels

Chart 2 : Bag Side Panel

Crochet Stitch Legend
Whether you're a seasoned crocheter seeking a fresh challenge or a newcomer to the world of fiber arts, this project has provided an opportunity for creative expression and skill-building. As you take your completed crochet bag with its unique texture and macramé cord handles out into the world, you're not just carrying an accessory; you're carrying a piece of your own craftsmanship and creativity.
Now, with your newfound knowledge and skills, you have the power to continue exploring the limitless possibilities of crochet and macrame cord. So, gather your materials, embrace your creative spirit, and craft more beautiful and unique pieces.
If you have any more questions or need further assistance, feel free to ask. Happy crafting!


No comments:
Post a Comment